이번게시글에서는 spring security 설정방법을 정리해보겠습니다.
spring security의 설정 파일입니다.
@EnableWebSecurity
public class SecurityConfig extends WebSecurityConfigurerAdapter {

    @Override
    protected void configure(AuthenticationManagerBuilder auth) throws Exception {
        auth
                .inMemoryAuthentication()
                .withUser(
                        User.withDefaultPasswordEncoder()
                                .username("user")
                                .password("user123")
                                .roles("USER")
                ).withUser(
                User.withDefaultPasswordEncoder()
                        .username("admin")
                        .password("admin123")
                        .roles("ADMIN")
        );
    }

    @Override
    protected void configure(HttpSecurity http) throws Exception {
        http
                .authorizeRequests()
                    .antMatchers("/").permitAll()
                    .anyRequest().authenticated()
                    .and()
                .formLogin()
                .permitAll();

    }

    @Override
    public void configure(WebSecurity web) throws Exception {
        web.ignoring()
                .requestMatchers(
                        PathRequest.toStaticResources().atCommonLocations()
                )
        ;
    }

}
1. configure(HttpSecurity http)
@Override
protected void configure(HttpSecurity http) throws Exception {
    http
            .authorizeRequests()
                .antMatchers("/").permitAll()
                .anyRequest().authenticated()
                .and()
            .formLogin()
         // .loginPage("") // 커스터마징한 로그인페이지가 있다면 명시 저는 없으니 주석처리합니다.
            .permitAll();
루트페이지에 대한 요청은 누구나 접근이 가능하고, 다른요청에 대해서는 권한이 필요하다는 설정을 하였습니다.
그리고 formLogin을 권한없이 사용하겠다는 설정을 하였습니다.
(loginpage permitAll 설정이 없으면 로그인페이지는 권한이없네 로그인페이지로 이동 이라는 무한루프가 생겨 리다이렉션이 너무 많다는 오류가 나니 꼭 설정해줍니다.)
loginPage의 html 경로를 설정해주지않으면 DefaultDefaultLoginPageGeneratingFilter가 제공하는 스프링 시큐리티의 기본 로그인페이지를 이용할 수 있습니다.
(이 설정파트에서 커스터마이징한 filter를 추가해서 인증로직을 태우거나 BasicAuth를 사용하는등 대부분의 기본설정은 해당 메서드에서 이루어집니다.)
2. configure(Websecurity web)
@Override
public void configure(WebSecurity web) throws Exception {
    web.ignoring()
            .requestMatchers(
                    PathRequest.toStaticResources().atCommonLocations()
            );
}
이 설정파트는 resources, static 아래에 있는 파일들의 접근권한을 설정합니다.
requestMatchres 내부에 js/**, css/** 등을 직접 넣어서 설정할 수도 있습니다.
3. configure(AuthenticationManagerBuilder auth)
@Override
protected void configure(AuthenticationManagerBuilder auth) throws Exception {
    auth.inMemoryAuthentication()
            .withUser(User.builder()
                .username("user")
                .password(passwordEncoder().encode("user123"))
                .roles("USER"))
            .withUser(User.builder()
                .username("admin")
                .password(passwordEncoder().encode("admin123"))
                .roles("ADMIN"));
}
이 설정파트는 AuthenticationManager를 설정하는 곳입니다.
auth.jdbcAuthentication() 를 통해 직접 db에서 조회하는 경우도있고
auth.authenticationProvider(provider 설정) 프로바이더를 설정해서 필터에서 사용하기도 하며
auth.inMemoryAuthentication() 로 직접 유저를 넣어줄 수도 있습니다.
저는 마지막 방법을 사용해 직접 유저를 넣어줬습니다.
4. controller
package com.example.securitytut.controller;

import org.springframework.security.access.prepost.PreAuthorize;
import org.springframework.security.core.Authentication;
import org.springframework.security.core.context.SecurityContextHolder;
import org.springframework.web.bind.annotation.GetMapping;
import org.springframework.web.bind.annotation.RestController;

@RestController
public class HomeController {

    @GetMapping("/")
    public String test() {
        return "home";
    }

    @GetMapping("/auth")
    public Authentication auth() {
        return SecurityContextHolder.getContext()
                .getAuthentication();
    }
}
간단한 컨트롤러를 만들어 설정이 잘 동작하는지 확인해보겠습니다.
5. 실행화면
(1). 루트페이지

permitall()설정을 했으므로 권한이 없어도 접근이 가능합니다.
(2). /auth
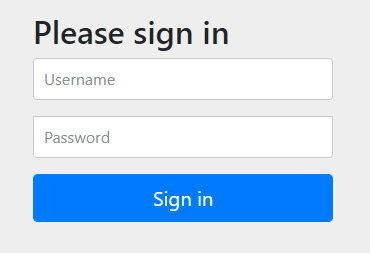
로그인페이지를 설정하지 않았으므로스프링이 제공하는 로그인페이지가 올라옵니다.
해당 html은 DefaultLoginPageGeneratingFilter 에 구현되어 있습니다.
(3). user/user123 으로 로그인한 결과
{"authorities":[{"authority":"ROLE_USER"}],"details":{"remoteAddress":"0:0:0:0:0:0:0:1","sessionId":"D3CA49FEF5D724F90BA8D98BB53B2798"},"authenticated":true,"principal":{"password":null,"username":"user","authorities":[{"authority":"ROLE_USER"}],"accountNonExpired":true,"accountNonLocked":true,"credentialsNonExpired":true,"enabled":true},"credentials":null,"name":"user"}
"authenticated":true,"정상적으로 인증된 Authentication 객체를 반환하는 모습입니다.
'Spring' 카테고리의 다른 글
| spring security란 (0) | 2021.03.31 |
|---|---|
| logback 로그 설정하기(에러로그 따로 관리하기) (0) | 2021.03.23 |
| logback 로그 설정하기(파일 저장) (0) | 2021.03.18 |
| spring Slf4J, logback 로그 설정하기(콘솔창 출력) (0) | 2021.03.17 |
| log4jdbc2를 사용해 쿼리 로그 설정하기(mybatis 테이블 로그) (0) | 2021.03.17 |


댓글